

How to Check & Fix Website Indexation with Free SEO Tools

Proper website indexing is the most important part of ranking on Google. Without it, every other SEO strategy in the known universe is entirely useless.
November 14, 2025 ~ By Shari Rose
In search engine optimization, some of its most effective strategies can be incredibly technical and require a web developer’s knowledge to execute perfectly. And then there are frustratingly simple fixes that create the biggest impact of them all. Indexation is of the latter quality, and it quite literally makes or breaks every other SEO strategy known to humankind. Indexation affects whether a website’s pages can appear in search engine results in the first place. If Google can’t index your web pages, they won’t show up in its results, full stop.
At Cause Engine Marketing, we have seen far too many business owners, solopreneurs and nonprofit managers ready to give up on their professional dreams because long-term SEO efforts have led to no new traffic or rankings. And it’s often all because of a single setting on the website’s backend that has been telling Google to keep its pages out of search results the whole time. It’s an entirely preventable problem in SEO, and we’re going to show you exactly how to check and fix it yourself with free tools.
- Screaming Frog Tool
- Google Search Console
- WordPress Indexing Settings
- Squarespace Indexing Settings
- Wix Indexing Settings
- Conclusion
How to Check if Your Site’s Pages are Indexable for Free
Before we can worry about any other SEO consideration for your website, such as keyword optimization or loading speed, it’s mission-critical that the site is indexable and able to appear on Google at all. There are a few ways to determine the indexability of your web pages with some free tools, which we’ll break down here. We recommend doing this in two or three steps, depending on the size of your website.
To begin, let’s get a birds-eye view on your indexability with a site: check. Head over to Google and type the following into its search bar:
site:yourdomain.com
Make sure to replace “yourdomain.com” with your website. This will pull up the list of pages that Google is allowed to see and index. Are you seeing all the URLs you expected to find? Or are there only a few pages listed when you know you have dozens more on the site?

Please note: The site: search function is not always a perfect system. Sometimes pages marked indexable will not appear on Google for other reasons, and vice versa. This exercise is meant to give users a broad idea of their site’s overall indexability, and just how significant the problem might be to their SEO performance. To find highly accurate data on each web pages’ indexability, let’s go to the next step.
Check Indexation Using Screaming Frog’s Crawling Tool – First 500 URLS Free
Because the free version of this tool is limited to 500 URLs, Screaming Frog is better suited for smaller websites, but larger sites can still benefit from its mind-blowing data collection. If you have a robust library of articles or many product listings, it’s likely that your site will exceed its limit on 500 free URLs. That said, Screaming Frog is a powerful crawling tool that analyzes a wide array of Technical SEO elements, including broken pages, oversized images, redirects and the all-important indexation status of web pages.
After downloading the software, enter your website domain into the search bar, ensuring it’s set to Subdomain on the right. Once it’s finished crawling, head over to Crawl Data > Internal > HTML, clicking on HTML.

This tab excludes JavaScript and CSS coding to narrow down on just your normal web pages. In the list of URLs, scroll to the right to check the indexation status of each one. It should look something like this:

The specific organization of your tabs may look different, so keep scrolling until the “Indexability” tab is visible. You can click on that tab at the top of the list to organize pages by indexation status, so it’s easier to see which URLs are “Indexable” versus “Non-Indexable.”
Checking Page Indexability on Search Console
If the crawl limit is exceeded and you want to check individual pages, Google Search Console is an incredible free SEO tool that provides in-depth information on your website’s performance on Google, including indexation status. It includes estimated organic traffic, keyword rankings, online impressions and a slew of handy features that help website owners strengthen their visibility in search engines.
If you haven’t already, go create a free account and connect it to your site before hopping back here. Here’s how to connect Search Console to WordPress and Squarespace.
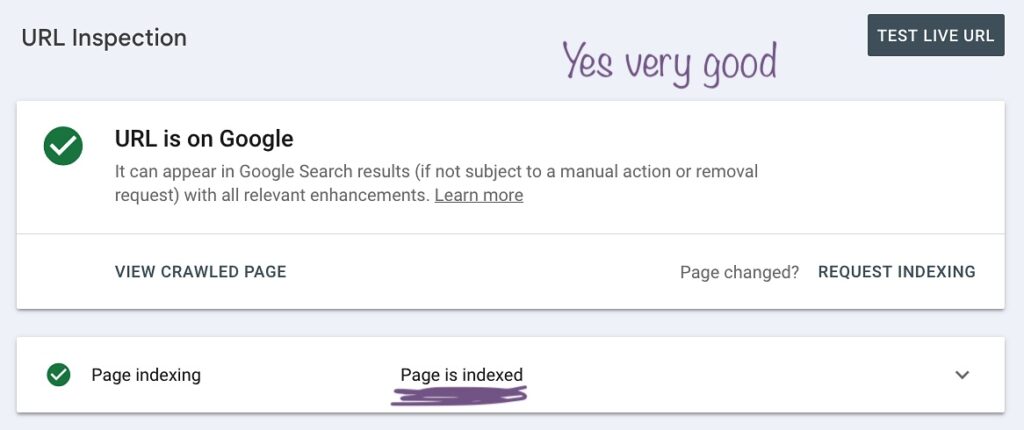
Once you have your account up and running, look for the search bar at the top that says “Inspect any URL.” Enter a single URL. It will return a few important pieces of data, namely whether the page is indexed in Google. If you see this result, then that page is indexable and there’s nothing further you need to do:
However, if you are informed that the URL is not on Google, that means the page cannot be indexed. In this example, this page cannot appear in search results because it is marked “noindex”:

If you see this result for any URLs that have SEO value, such as the homepage, About, Services, blogs and more, it’s time to make this fix.
How to Fix Non-Indexable Pages on WordPress, Squarespace & Wix
For this guide, we’re going to focus on three of the world’s most popular website builders: WordPress, Squarespace and Wix. If you use a different builder, it’s likely these instructions will be fairly similar for your platform. It may take a little more digging, but you’ll want to look for things like “SEO settings”,”search appearance”,”crawlers” and “search engines” in your builder’s settings to find the site’s indexation rules.
Please note: In cases where the robots.txt file is preventing page crawling/indexation, the solutions below will likely not be adequate for fixing those errors. Editing a robots.txt file requires more technical skills than these steps, so if you suspect your website is being negatively affected by a few lines of code in that file, we recommend reaching out to your website developer or our SEO team for assistance. To check what your file contains, enter yourdomain.com/robots.txt.
Indexation Settings on WordPress
Because WordPress is such a robust CMS with lots of plugin options, the indexation settings may be found in a few places, depending on your website’s setup. The plugin we’re going to dive into here is Yoast because it is a very popular SEO plugin that’s installed by default by certain web hosts, like HostGator. If you happen to use Rank Math instead, here’s helpful tips for adjusting their indexation settings.
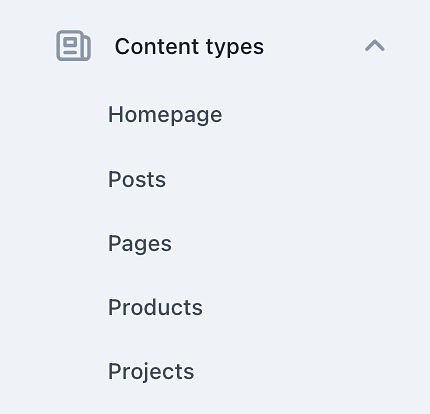
For an individual page that is marked noindex, go into its backend via the “Posts” or “Pages” option in your sidebar. Click on the page you’re looking for in those results and scroll past its content box where the on-page writing can be edited. Yoast is typically found toward the bottom with other plugins, and will looking something like this:

Click on its dropdown icon to open options. Scroll down to the bottom of the Yoast box and click on “Advanced.” Under “Allow search engines to show this content in search results?” the answer should be “Yes (current default for Pages).” The next option, “Should search engines follow links on this content?” should also be marked yes, as seen here:

If the first option was initially marked “No,” then you know that’s where the issue was occurring. However, if you find that Yoast has marked this as a “Yes,” but the page is non-indexable, then the indexation setting you’re looking for is somewhere else.
Particularly if the setting said “No (current default for Pages),” then there is a global setting through Yoast that is hiding all your site pages from search engines.
In cases where you suspect there is a sitewide rule hiding your pages, go to “Yoast SEO” in the WordPress sidebar. After landing on the Yoast dashboard, click on “Settings” in your sidebar, just under “General.”
In the Yoast sidebar, click on “Pages.” In cases where your blog posts are marked noindex, click on “Posts.”
Under “Show pages in search results,” check if the flip switch is marked in the ON position, like this:
 If it is in the OFF position, then that means all your pages are currently non-indexable. Flip that switch on to change this across the site.
Depending on your WordPress config, it may take a little digging to find exactly what plugin is causing indexation issues, but this is by far the most common way our SEO specialists at Cause Engine find the source of our clients’ indexation woes.
Squarespace Indexation Settings
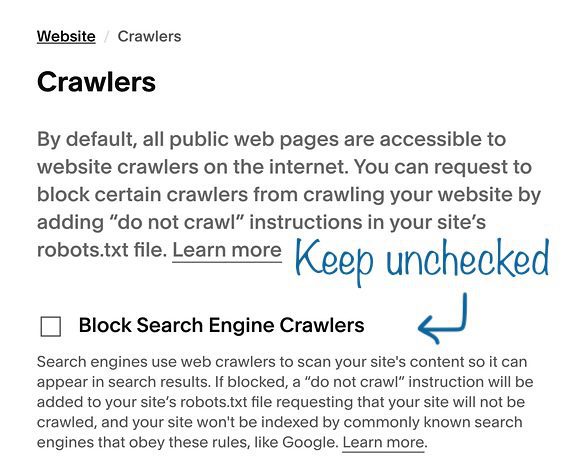
For those who use Squarespace, here’s how to adjust indexation settings on a sitewide basis, as well on individual pages. If you suspect that your entire site is non-indexable, click on the little gear icon on the bottom left side of your website’s backend. Then go to “Website” and scroll down and click on “Crawlers.”
The first checkbox that reads “Block Search Engine Crawlers” should be unchecked. If it is checked, that means the whole website is non-indexable. Uncheck it immediately if that’s the case. Your settings should look like this:
For a single page that is erroneously marked noindex, you’ll need to jump into its individual settings. In the Squarespace sidebar, click on “Website” then “Pages.” Here, you can see all your web pages. Find your page that is non-indexable and hover over it to reveal a little gear icon next to its name. Click on that to open its settings box.
Next, click on SEO in the sidebar and scroll down to the very bottom. You’ll see a flip switch that says “Hide Page from Search Results.” If that is flipped to the ON position, flip it off so it looks like this:

Indexation Settings on Wix
For Wix users who suspect there is a sitewide setting hiding their pages in search, sign into your account and go to Site & Mobile App > SEO & GEO. Scroll down to “SEO Settings” and click on it. Under “Set site Preferences,” ensure that the first option, “Let search engines index your site” is switched to the ON position, like this:

To check the indexation settings for individual pages on a Wix site, go to “Edit Site” at the bottom of your sidebar. Once in the Website Editor, look for the page dropdown menu in the top right corner, here:

Click on the dropdown menu and click on “Manage Pages.” Next, click on the 3-dotted icon next to the page you want to address. In this example, we’ll do the homepage:

Click on “SEO Basics” and scroll down until you see a flip switch called “Let search engines index this page.” Ensure that the switch is in the ON position so that Google and other engines can index your page.
Check & Fix Your Site’s Indexation Issues Today for Free
Hopefully this guide is a useful tool in your SEO toolbox for addressing all-too-common indexation issues that can have devastating consequences for website owners. At Cause Engine, we’ve worked with companies that learned a majority of their product pages had been hidden from Google for years, as well as a small nonprofit whose single setting had kept their full website off search engines – and that was after huge content marketing push resulting in dozens of new blog posts that never had a chance to reach their organic audiences.
That sort of thing shouldn’t happen to organizations that spend months, sometimes years, on search marketing strategies that will never produce the results they need because of a simple indexation error. If you’ve taken the steps above and are still seeing non-indexable issues appear on your site, there may be other elements at play, such as certain rules being written in the robots.txt file. In those cases, we recommend reaching out to your website developer or asking our SEO team for assistance.
If you’d like to learn more about the organic marketing services our brilliant specialists provide at Cause Engine, please head over to our Local SEO page or request a quote today.